Posts

Poop deck repair and stern locker rebuild on a Cape Dory Typhoon sailboat - part 1

Image
The boat came to me with extensive core rot on the deck, cabin top, cockpit seats and cockpit bulkhead and especially on the poop deck at the stern of the boat. Here, there were multiple penetrations for deckplates, the traveler, cleats etc which had not been sealed properly letting in a lot of moisture. In addition, the camber on the deck top had been flattened down by the traveler, so it collected standing water with inadequate drainage which only added to the deck rot. Basically all the core was gone, and both remaining fiberglass layers had to be cut so  I cou l d easily access the area below the poop deck to build a stern locker to store a portable gas tank. Honestly I am not a fan of two design points on these Cape Dory yachts: 1- the inaccessible bilge and 2- this very large space under the poop deck which is only accessible by a vertical deck plate with a 4" hole fitted behind and over the rudder post, just enough space to fit a hand but not much else. Since the original T

Epoxy barrier coat for the bottom of a Cape Dory Typhoon sailboat

Image
Owners of trailer-sailor boats like the Cape Dory Typhoon generally don't bother with epoxy barrier coating  and instead go with bare bottoms or a coat of ablative antifouling to protect their boat bottoms from excessive marine growth. Since these boats are kept on trailers rather than in the water for extended periods of time, there is probably no need to apply barrier coat paint. However, I do plan on keeping Cantaora moored or docked for long periods in waters particularly prone to promoting growth on boat bottoms so I will be applying epoxy barrier coating as well as several coats of antifouling paint  The bottom on Cantaora was stripped and sanded clean with 80 grit on a palm sander, wiped down with alcohol and, over the course of a few days, was painted with several layers of epoxy barrier coating. The gel coat under the stripped ablative antifoulng was in decent shape, and apart from a previously patched area, and the two cockpit scupper holes I had patched myself, there wer

Replacing the toe rail on a Cape Dory Typhoon 1: molded-in deck scuppers

Image
The old teak toe rail on Cantaora had been sanded down and was far too worn out to be salvageable and had to be replaced, along with the teak taffrail.  I used long strips of PVC exterior window trim obtained from my local hardware store to build up the toe rail. PVC takes to being fiberglassed quite well, as long as you prepare the surface with rough sanding followed by an acetone wipe-down. The trim pieces come in 7 foot long sections and a variety of profiles; I used the ones with a rectangular profile of 3/4" wide and 1/4" thick. Stacking two over each other and epoxying them around the deck sides would add 1/2" of height to around the decktop. (I could have just continued building up the toe rail this way and given-up on a wooden toe rail in favor of a completely molded-in one, but decided the wood look was too classic to give up.)  The PVC strips had the added benefit of being very flexible and easily bendable, so they could be bowed to take the curved shape of the

Painting prep part 2: sanding the deck

Image
Now that the weather is nicer & more suitable for restoring old sailboats, I returned to making a lot of dust by sanding Cantara's deck clean of all old non-skid and paint in preparation for a new boat paint job. One of the curious discoveries after sanding away the old deck paint were the aluminum plates under the stern cleats. Not sure who put them there or why; they were only lightly glassed-over so I am guessing they were not meant as backing plates to the cleats but were top plates instead? Are they original to the design? The pink filler matches that around the rest of the stern deck suggesting these were original to the boat. Cape Dory famously used mild steel backing plates for chainplates but flush aluminium top plates for stern cleats? Doesn't make sense. Anyway the whole stern deck is going to have to come off along with these plates due to extenive moisture damage around the deckplate holes, which extends all the way down to the cockpit seats too. Sanding the or

Painting prep: Tenting, screeding, and removing the toerails off of an old Cape Dory Typhoon sailboat

Image
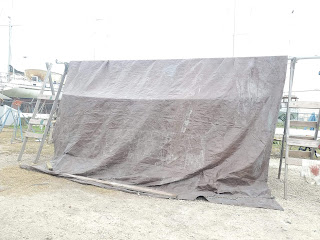
During the course of the day, I decided to tent the boat by draping a large donated tarp over her, using the mast as a beam. This is meant to keep the rain and morning dew off the boat and supplies o I can get started working earlier. After the old paint was stripped off Cantaora's hull and the old holes for thruhulls were all glassed-in, it was time to start prepping the hull surface for fairing and painting. The actual painting of a boat doesn't take nearly as much time as preparing the surface beforehand. First: fix damaged areas of the hull and fill in large holes.  I had to deal with the cosmetic damage at the bow where the boat had scraped against her ill-suited trailer, according to the prior owner. A large chunk of fiberglass has been gouged out, but this also happens to be the strongest point in the hull with very thick fiberglass so the damage was cosmetic.  Fixing the gouge involved sanding back the area and putting several layers of fiberglass into and over the goug

Freezing Christmas, with bling for my boat

Image
  With temps falling to freezing for the next few days for Christmas, all work is stopped. Epoxy doesn't cure well below 50 degrees F and I don't work well at that temp either.  The work delay is frustrating but I spent the time opening the boxes for some pretty bronze fittings I bought online for my girl. Cantaora came with a batwing-style stern light in aluminum that literally fell apart in my hand as I was taking it off, so that will be replaced with a bronze batwing style stern light. It took some effort to locate one with a glass lens; plastic lenses on these vintage light fixtures tend to have clouded-up over time, potentially reducing the light's visibility which is set at a min. 2 nm by law. Note the three bronze padeyes. Two will be used for the sheeting blocks, and the third will be a strong point to connect a tether in the cockpit. I also got a nice bronze bi-color bow light. The separate port and starboard nav lights on the standard Typhoon are located on the ca

Stripping old bottom paint from a Cape Dory Typhoon

Image
The yard workers got around to taking Cantaora off her ill-suited and broken down old trailer onto a few jackstands. This gives me easier access to the boat bottom to start stripping her old bottom paint too now that her topsides was completely stripped of old paint. Stripping a boat bottom of old anti-fouling bottom paint is a miserable, time-consuming job so I've learned to first get almost all the old ablative paint off with a chemical stripper called Peel Away. The stuff is not cheap but the cost evens out if you consider the yard time that is saved. I made a point of applying the stripper a little heavier around the areas that are harder to sand, including tight curves. Sold in kit form, Peel Away is highly caustic water-based putty that is spread on the hull bottom over the ablative paint (I apply it with notched trowel first before smoothing it all out) then covered with 3'x3' plastic sheets (comes with each kit) and left overnight.  The next day, the caustic putty a