Painting prep: Tenting, screeding, and removing the toerails off of an old Cape Dory Typhoon sailboat
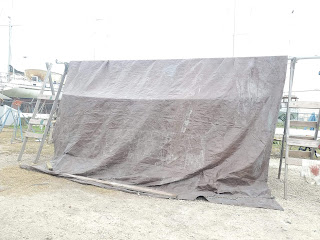
During the course of the day, I decided to tent the boat by draping a large donated tarp over her, using the mast as a beam. This is meant to keep the rain and morning dew off the boat and supplies o I can get started working earlier.
After the old paint was stripped off Cantaora's hull and the old holes for thruhulls were all glassed-in, it was time to start prepping the hull surface for fairing and painting. The actual painting of a boat doesn't take nearly as much time as preparing the surface beforehand.
First: fix damaged areas of the hull and fill in large holes.
I had to deal with the cosmetic damage at the bow where the boat had scraped against her ill-suited trailer, according to the prior owner. A large chunk of fiberglass has been gouged out, but this also happens to be the strongest point in the hull with very thick fiberglass so the damage was cosmetic.
Fixing the gouge involved sanding back the area and putting several layers of fiberglass into and over the gouge, to fill and cover it. Then it was just a matter of fairing over the spot when screeding the rest of the boat. (I used an old can of epoxy hardener, which is why it has a red tint though this has no effect on the results.
Next: screeding. There were several divots left from the paint stripping process and the boat hull was generally uneven after the old paint was removed. These had to be filled-in. Screeding refers to the rough leveling of the uneven surface of a boat hull (or wall or any other surface) by scraping a thin layer of filler across it with the sharp edge of a long trowel. The point is to fill-in and flatten out the larger divots and indentations on the surface, so it can all then be sanded relatively flat.
After marking the waterline with painters tape, I used a peanut butter-consistency filler paste made with West 410 Microlight fairing filler and West epoxy resin to screed the boat using a 12" cheap trowel, then sanded it all down with a palm sander and 100 grit disc. The Microlight fairing filler sands smooth easily, and I was generally happy about the fairness of the hull after this first fairing and sanding. Several more will follow. I still have to screed and fair the bottom too.
After screeding and once the boat hull was sanded smooth, the result was a pretty fair surface though raking light shows a few problem areas which will be addressed with the high-build primer that comes next.
Finally, I had no more excuses to put off what I was sort of dreading: removing the teak toerail and taffrail which were in hopeless condition. This was easier than I had imagined because it turns out the toerail was not bolted through the hull-deck joint! It was simply screwed in, and came off easily (though not in single pieces) once the teak bungs covering the screws had been pried off the wood and the toerail was then unscrewed. There was once screw every 6" along the toerail so the process got a little repetitive.
I sanded the area under the old teak clean to reveal the crack from the hull-deck joint, filled with filler. All the old toerail screw holes, which seem go more than an inch into solid fiberglass hull-deck joint, will have to be filled-in all the all the way in what will be a tedious repetitive process of replacing the toerails.


Comments
Post a Comment